-25%
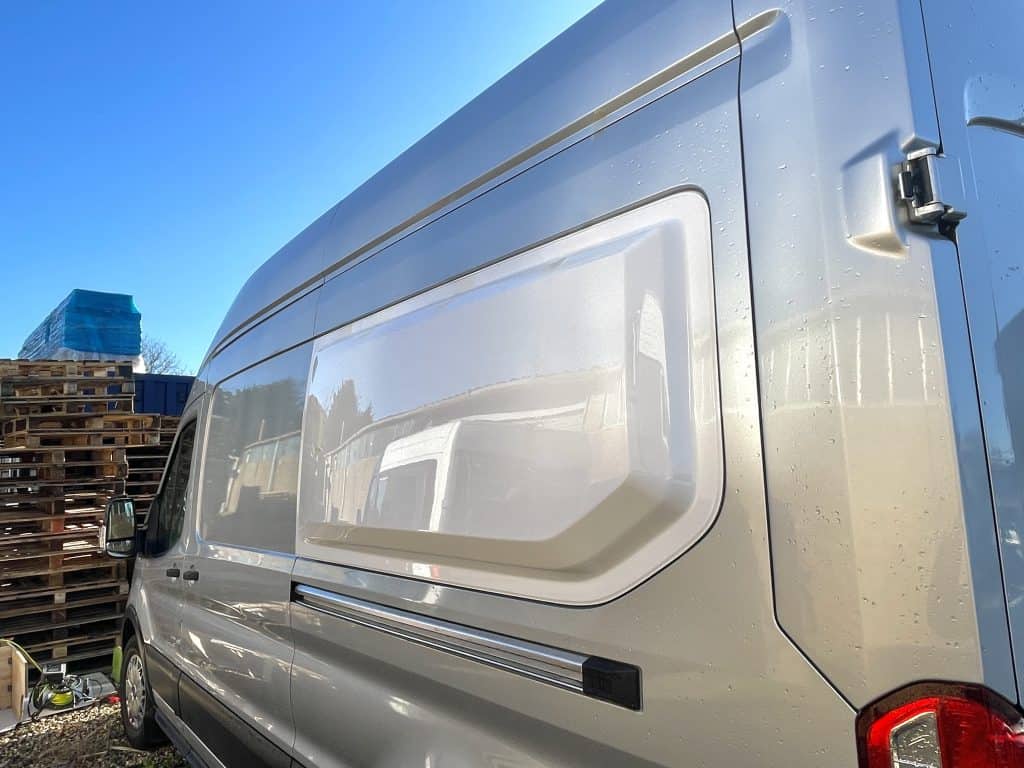

Space Pods / Side flares
$ 91.32
Wilderness Vans on Instagram: “Installing flares is just like installing a windshield… minus the part about cutting a great big hole in the side of your van. #WildernessVans” IMPORTANT: PLEASE READ BEFORE PROCEEDING WITH FITTING Space Pod Fitting Instructions Check Fit Before Permanent Changes: Ensure the Space Pod fits properly before gluing, painting, or sanding. Return the pod in its original box for a full refund if unsatisfied. No refunds will be given if the pod is glued, painted, or wrapped. Preparation: If painting, avoid low baking or heating the pod to prevent distortion. When wrapping, be cautious not to overheat the GRP to prevent hard bubbles forming later. Ideally, paint the pods after fitting. Surface Keying: Key the surface of the van with wet and dry and the Space Pod with 120 grit sandpaper. Sand down any high points on the Space Pod back surface. Do not use etching primer paint on the Space Pod; use only sandpaper for keying where adhesive will be in contact. Adhesive Application: Apply polyurethane adhesive to the van in a constant bead around the sides and top of the pod to prevent leaks. Cut a “V” shape in the nozzle for a higher adhesive bead. Use 1.5 tubes of Sikaflex 252 or similar adhesive per Space Pod. Bonding Process: Bond the pod in place; use masking tape and wedges to help hold the position. Place a ratchet strap or similiar around the van body and the Space Pod to apply light pressure. Use foam blocks under the straps in specific places to push the Space Pod if necessary. Adhesive Cleanup: Clean off any excess adhesive before it sets; tar and oil remover works well. Final Touch: Once bonded, apply a bead of adhesive along the front edge of the pod to finish.